Managing your Squarespace website solo? Whether you’re working with a web designer, SEO expert, or marketing team, bringing in an extra set of hands can help streamline your workflow and keep your business running smoothly.
Table of Contents
But before you consider sharing your login credentials (big no-no!), there’s a secure way to delegate access—by adding an authorized user to your Squarespace site. In this quick guide, we’ll show you exactly how to do it in just a few clicks.
Why You Need to Add an Authorized User (The Smart & Secure Way)
Running a website is a team effort. Whether you’re a small business owner, entrepreneur, or growing brand, collaboration is key to success. Instead of risking security breaches by sharing login details, Squarespace allows you to grant access to team members with specific permissions.
With this method, you can:
✅ Give the right access to the right people—without sharing sensitive info.
✅ Ensure security by assigning different permission levels.
✅ Easily manage and remove users as needed.
Ready to set it up? Follow these simple steps to add an authorized user to your Squarespace website.
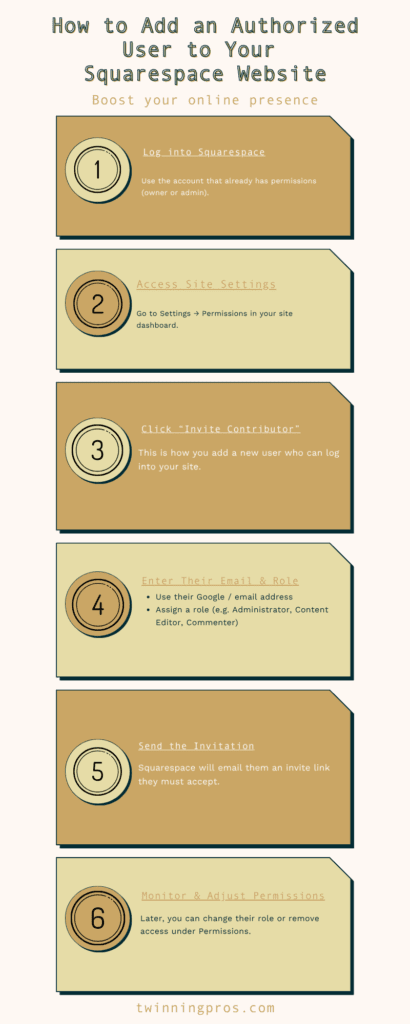
To add an authorized user to your Squarespace website, follow these steps:
1. Log in to Your Squarespace Account
- Go to Squarespace.com and sign in.
- Make sure you have Admin permissions to add new users.

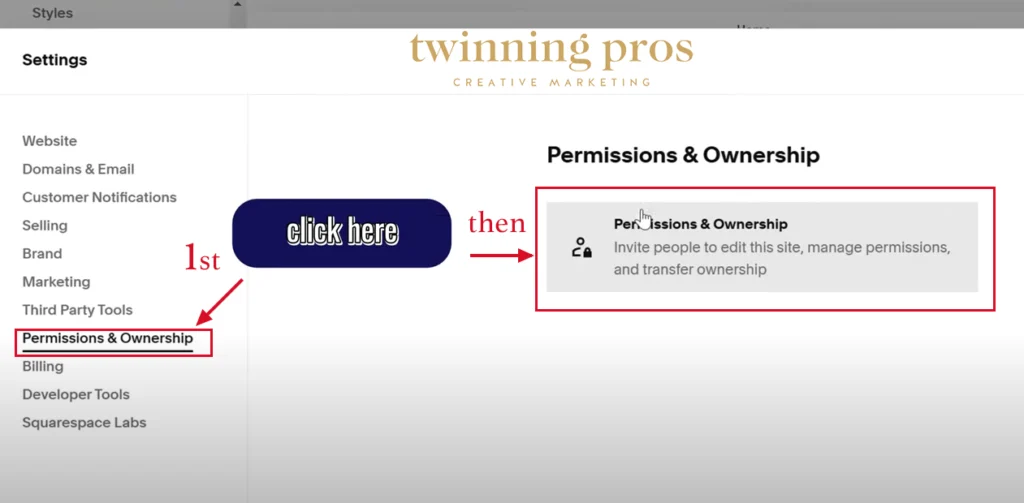
2. Access Site Settings
- From the Home Menu, click Settings.
- Select Permissions & Ownership to manage contributors.
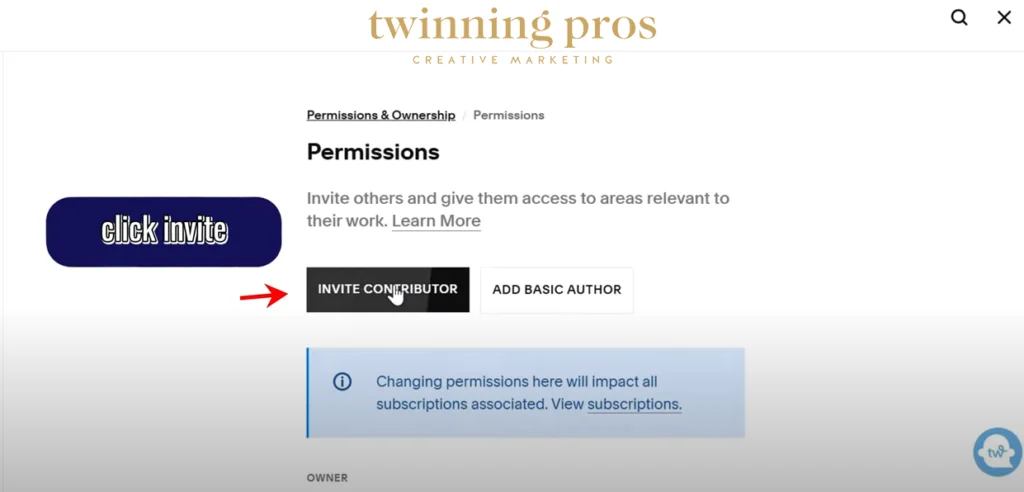
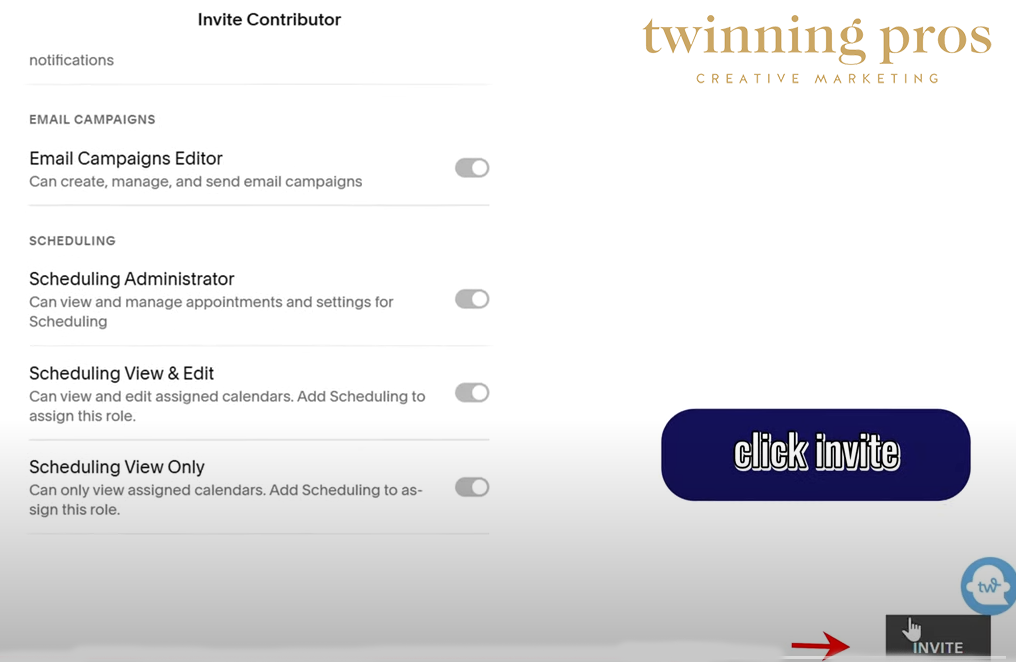
3. Invite a New User
- Click Invite Contributor.
- Enter the email address of the person you’re adding.
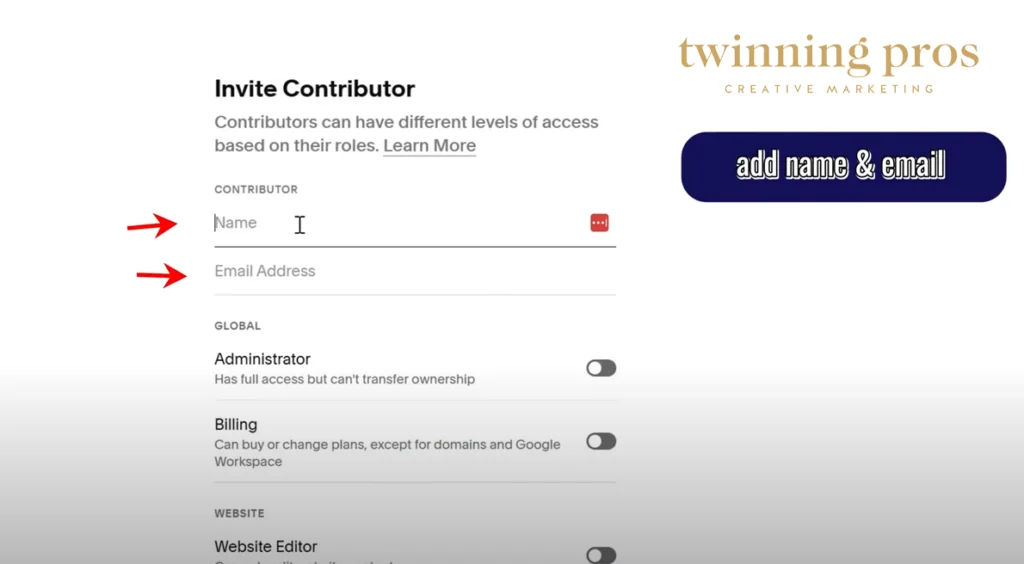
- Choose their permission level (see options below).
- Click Invite to send them an email request.
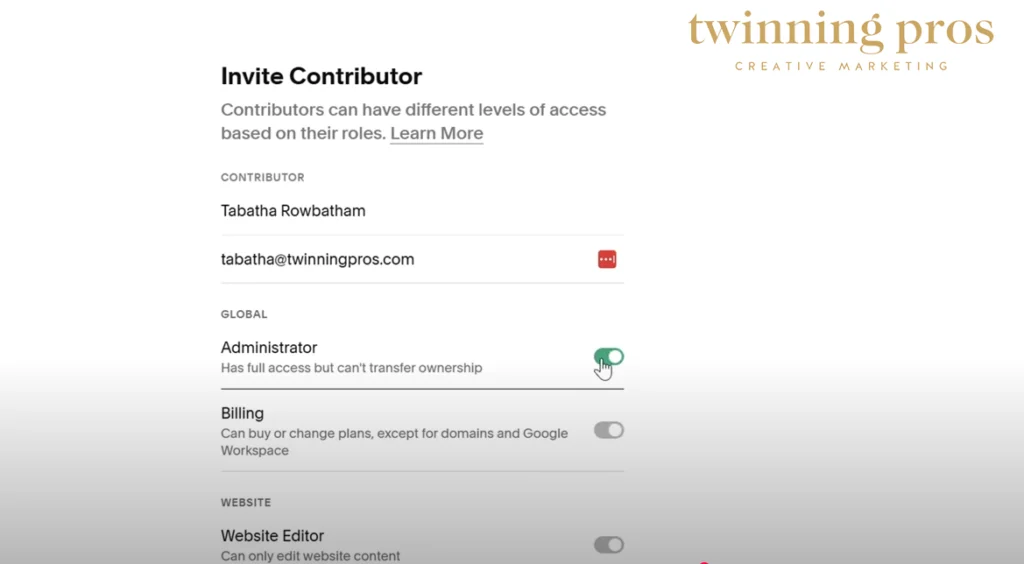
4. Choose the Right Permission Level
Before assigning access, consider what level of control the user should have:
| Permission Level | What They Can Do |
|---|---|
| Admin | Full control over the website, billing, and settings. |
| Editor | Can edit pages and content but can’t manage billing or permissions. |
| Billing | Only manages payments, invoices, and subscriptions. |
| Comment Moderator | Can only manage blog comments. |
5. Confirm the Invitation
- The invited user will receive an email notification.
- They must click the link in the email and accept the invitation.
- Once accepted, they can log in and start working on the site based on their permissions.
That’s it! You’ve successfully added an authorized user to your Squarespace site.
Why This Matters for Your Business
Still on the fence about adding users? Here’s why this feature is a game-changer:
Avoid Security Risks – Never share your login credentials! Authorized users have their own logins for safer access.
Scale & Delegate with Ease – Need a web designer, SEO expert, or virtual assistant? Give them limited access while keeping your account secure.
Stay in Control – You can update or remove users anytime from your Permissions & Ownership settings.
FAQs: Common Questions About Adding Users to Squarespace
🔹 Can I add multiple users?
Yes! You can invite multiple users and assign each one a different role.
🔹 What if I need to remove a user later?
Simply go to Settings > Permissions & Ownership, select the user, and click Remove.
🔹 Will Squarespace notify me when a user accepts the invite?
No, but you can check the Permissions tab to see if they’ve accepted.
Final Steps: What to Do Next
Now that you know how to add users, it’s time to put it into action!
Need expert help managing your Squarespace site? At Twinning Pros Marketing, we specialize in SEO, design, and digital marketing—helping brands like yours grow online.
Let’s talk! Schedule a consultation today. [Insert CTA Link]
By following these steps, you’ll keep your website secure while building a strong, collaborative team. Whether you’re adding a website designer, writer, or SEO expert, Squarespace makes it easy to delegate access without compromising security.
Ready to take your website to the next level? Stay tuned for more Squarespace tips & tricks from the Twinning Pros Marketing team!
Frequently Asked Questions
How do I add an authorized user to my Squarespace site?
Go to Settings, open Permissions & Ownership, click Invite Contributor, enter their email, choose permissions, then send the invite. They accept by email and log in with their own account.
Who can invite new users on Squarespace?
Only the site Owner and Administrators can invite contributors.
What permission level should I give a designer or SEO on my Squarespace website?
Use Website editor for content and page updates without design or settings access. Use Administrator only when full control is required, including settings and design. Billing is for payments only. You can also grant roles like Store manager, Analytics, Email Campaigns editor, or Viewer when needed.
Can I mix and match permissions on Squarespace?
Yes. You can enable multiple permissions. Turning on Administrator grants all permissions.
Can I give someone access only to post blogs on Squarespace?
Website editors can add and edit blog posts, but Squarespace does not support per-page permissions. If you need review before publishing, keep them as Website editor and you or an admin can handle page creation and design.
Can I give someone domain-only access or billing-only access on Squarespace?
Billing permission limits a user to billing tasks. For domain-only access, use Domain permissions when the domain does not share billing with a website. If the domain is moved to a website, it inherits the site’s contributor permissions.
Do contributors need their own Squarespace account?
Yes. Each contributor needs a Squarespace account. They can create one for free when they accept the invitation.
How many users can I add to Squarespace?
Most current plans allow unlimited contributors. Older Basic, Personal, and Cover Page plans have a two-contributor limit and are discontinued.
How do I edit or remove someone’s access later?
Open Permissions & Ownership, select the user, toggle permissions, or remove them entirely. Only the Owner and Administrators can do this.
The invite email did not arrive. What should I do?
Ask them to check spam for [email protected], or copy the Invitation Link from the Invites Sent area and send it directly.
Is it safe to share my login instead of inviting users to squarespace?
Do not share logins. Invite contributors with the minimum permissions they need, and ask them to enable two-factor authentication on their own account.
Can contributors use the mobile app to accept or manage access?
Yes. You can invite via the app, and contributors can accept from the email and then use the app to work on content.
What happens if two people edit at the same time?
Simultaneous edits can overwrite each other, so coordinate changes with your team.


SEO for Beginners
Learn from the SEO Strategist who has 75+ first page Google rankings under her belt.
We’re marketing nerds and business strategists that have generated millions of dollars in client revenue. We're sharing the systems and strategies to help your growing business with marketing that actually converts.
We're Tiffany + Tabatha
")


Comments